# Widget Tree
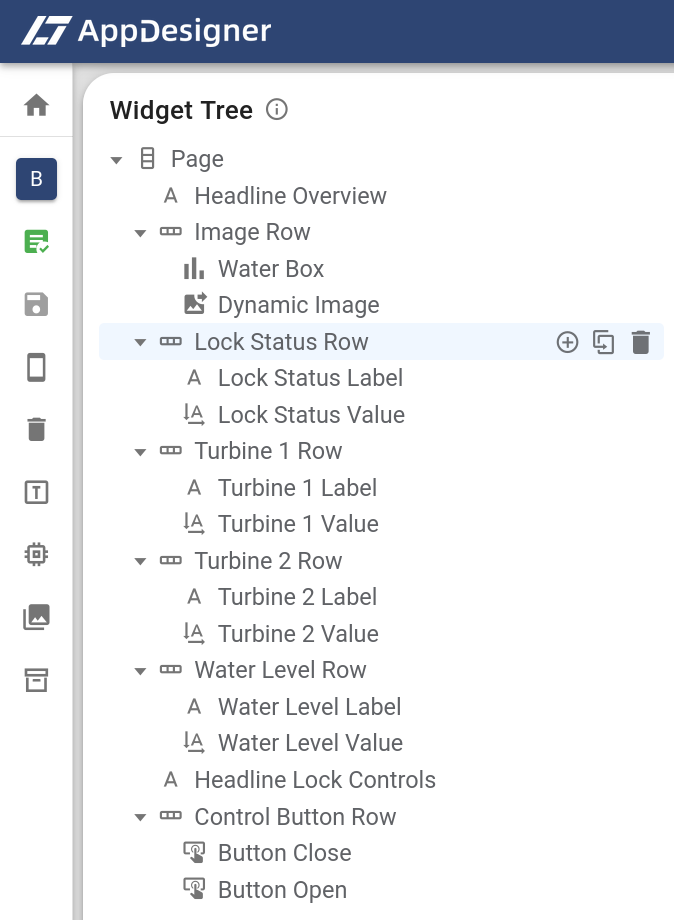
Besides the Widget Editor and the App Preview, the Widget Tree is one of the three main components of the app editor. It visualizes the structural design of the app UI in a hierarchical tree structure (see image below). The layout widget entries (page, row, column) in the widget tree can be expanded and collapsed by clicking the small arrow next to their title. This allows the contained widgets to be optionally hidden in the widget tree, providing a better overview. The parent-child relationship between widgets can also be seen in the indentation. Child widgets are always further indented relative to their parents. Besides visualizing the ui structure, the widget tree is furthermore the central place to reorder or remove existing widgets and to create new widgets.
# Adding Widgets
To add a new widget, you must first select a layout widget. As already explained, you can quickly recognize them by the expand/collapse arrow next to their title. Then, you will see icons for adding a new widget (), for duplicating the selected widget () and for deleting the selected widget (). Clicking on the plus icon will show the add widget panel at the bottom of the widget tree.
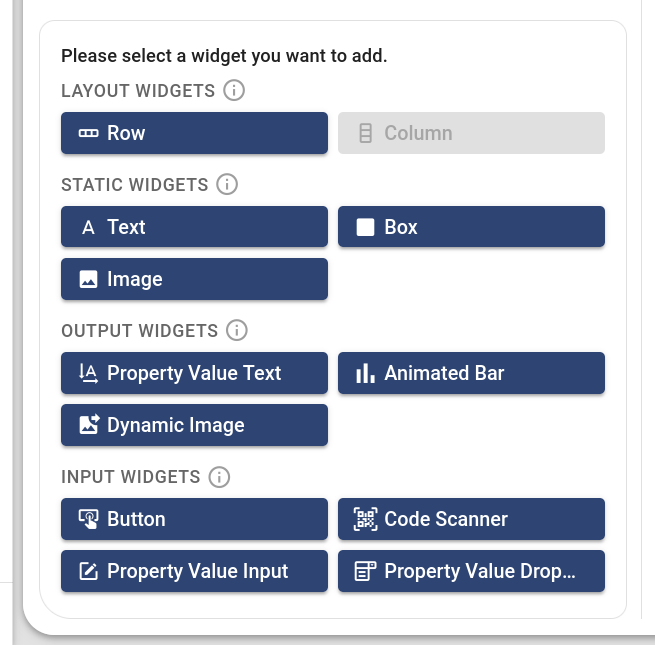
You can find a button for each widget type in the add widget panel. Keep in mind that row and column widgets are not allowed on all layout levels. If this is the case, the corresponding buttons will be grayed out. For more information on the exact rules, see the Layout Widgets section. You can also display more information about the individual widget types directly in the AppDesigner by hovering over the buttons or the info icons. By clicking one of the buttons, a corresponding widget is added to the currently selected layout widget and is directly selected for further editing via the Widget Editor.
# Duplicating Widgets
To duplicate a widget, you must first select the widget you want to duplicate in the widget tree. Three icons will appear. Clicking on the duplication icon () will display a dialog. After confirming the duplication dialog, a copy of the widget will be added to the widget tree on the same level as the original widget. You can recognize the copied widget by the (Copy) suffix. Keep in mind, that when you duplicate a layout widget, all of its child widgets will also be duplicated.
# Removing Widgets
In order to remove an existing widget you first have to select it in the widget tree. You will then see a small trash can icon () next to its title. Clicking on that icon will first display a confirmation dialog. The widget will not be deleted until that dialog is confirmed. Keep in mind that deleting layout widgets will also delete all of their child widgets.
# Reordering Widgets
The widget tree can also be used to reorder widgets. You can change their order or even move them a layout level up- or downwards. Just drag the widget in the widget tree to the desired position and drop it there. The UI will then update to the new structure. However, keep in mind that specific layout widget types may only be placed on certain levels (see Layout Widgets). You may also not drag existing layout widgets into other layout widgets when the resulting depth of layout levels exceeds 5 levels.
← Widgets Widget Editor →