# App Editor
After having selected an existing app or created a new app, you will be taken to the app editor where you can edit your app. The general structure of this view consists of three main sections: Widget Tree, Widget Editor and App Preview.
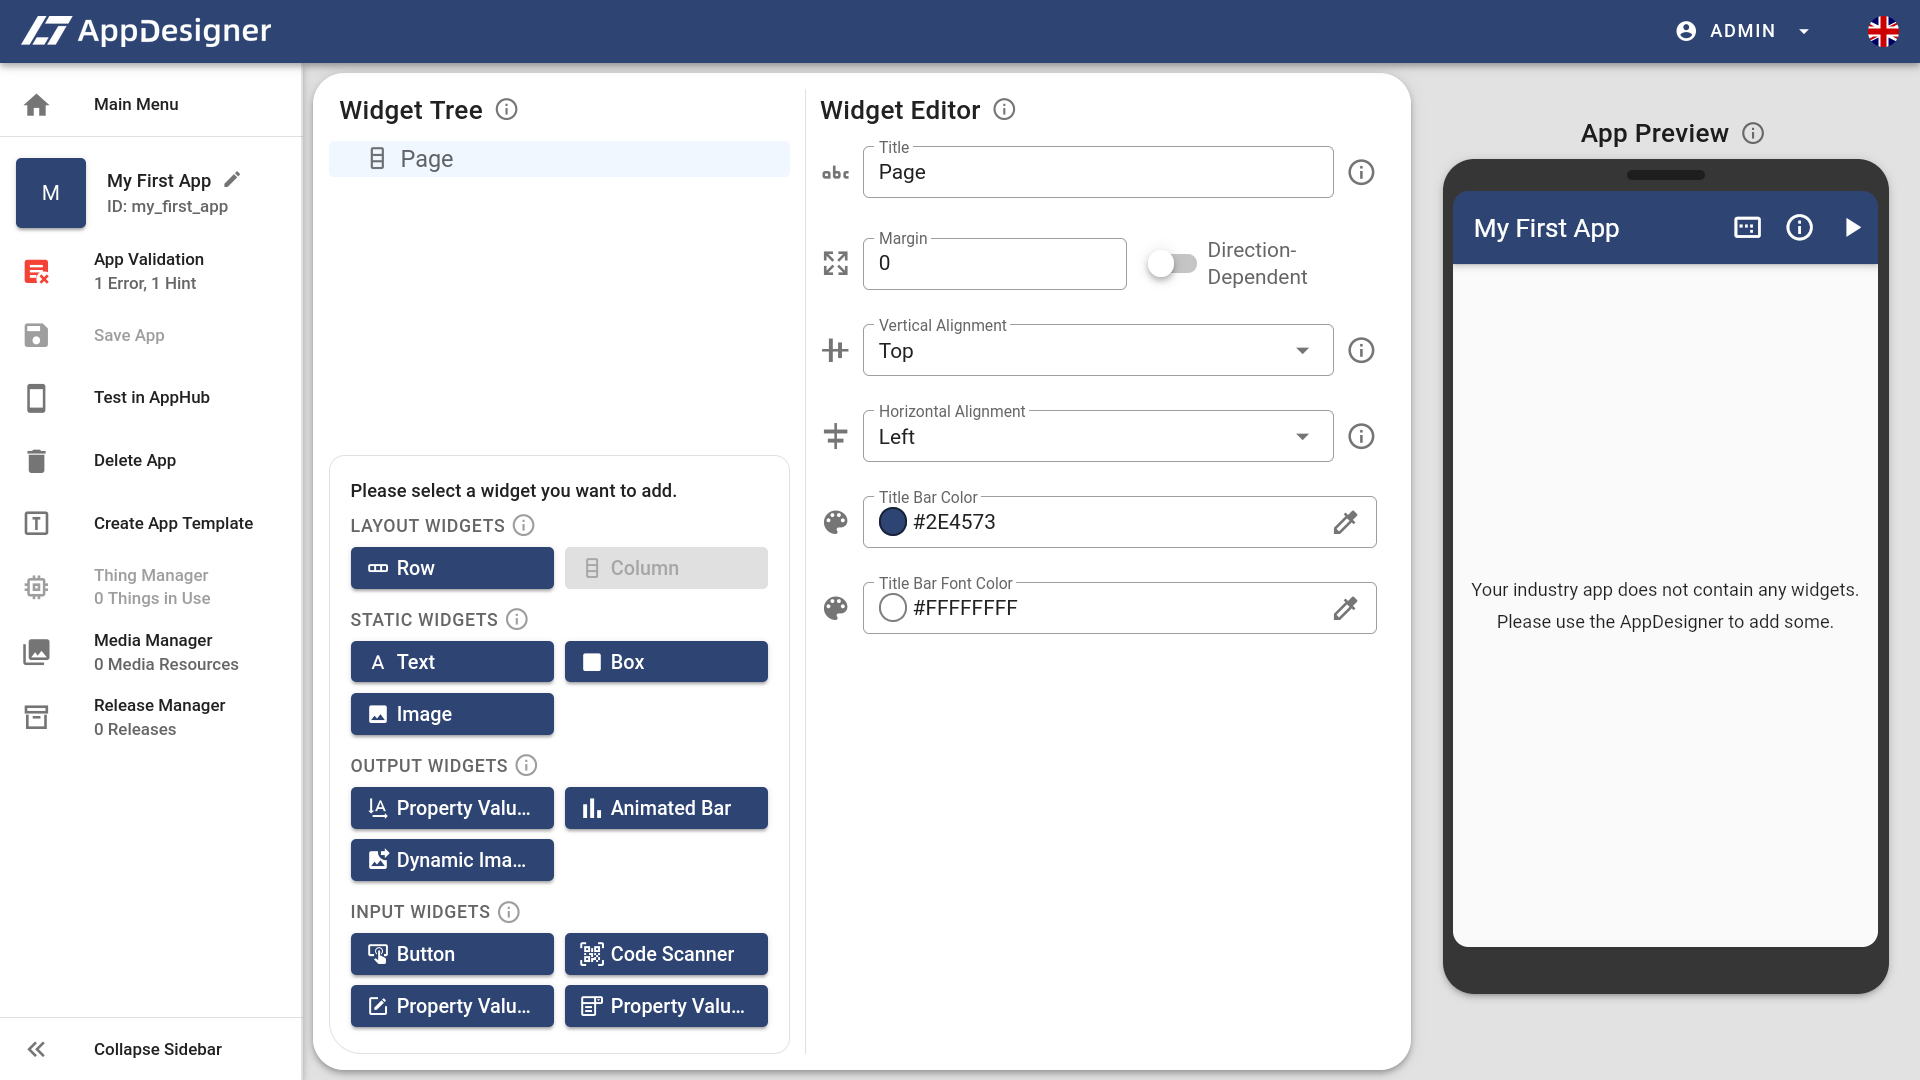
Widget Tree: The widget tree visualizes the graphical structure of the app as a tree-like structure. The individual elements of this tree are called Widgets. Adding, deleting and re-arranging widgets can also be done here. Detailed information about its functionalities can be found in the Widget Tree section.
Widget Editor: Depending on the widget currently selected in the widget tree, the widget editor contains various controls and input masks which can be used to customize the widget. Further information can be found in the Widget Editor chapter.
App Preview: The app preview always shows the current state of the app's user interface. This allows you to immediately see the effects of your adjustments to the user interface. Further functionalities like displaying debug lines or the simulation mode are explained in the App Preview section.
# Sidebar
Next to these three main parts, there is a sidebar on the left side which provides access to further functionalities.
Sample Image The sample image is shown in the AppHub's app overview (see image below). In the best case, it should be as square as possible because it will be cropped to fit a square. If you do not specify a sample image, a default sample image is displayed instead. In order to edit the sample image, just click on the image (or its placeholder) next to the app title in the sidebar.
App Title: The app title is initially set when you create a new app. It can be changed afterwards as often as you want. To do this, click on the little edit button () next to the app title.
App Validation (): The app validation entry displays the current validation state of your app. It shows whether the validation is running or not and how many errors and hints were emitted during the last validation run. Keep in mind, that the icon will change its appearance depending on the current state. Clicking the validation entry will open the respective app validation dialog. More information about the app validation can be found here.
Save App (): The current state of your app can be saved by clicking the sidebar's save app entry or by using the common keyboard shortcut CTRL+S. Saving your app is only possible when there are changes.
Test in AppHub (): If you want to test your app in the AppHub without creating a release, this is the option to go. Just click the entry in the sidebar and a temporary test version of your app will be generated for testing. More information about testing your app can be found on this page.
Delete App (): You can permanently delete your app by clicking the delete app entry and confirming the subsequently displayed dialog.
Create App Template (): App templates can be used to create new apps on the basis of an already existing user interface. In order to export your app as a template, click on the respective sidebar item. The overall process is described in detail in the App Templates chapter.
Furthermore you can access the Thing Manager, Media Manager and Release Manager via the sidebar.