Reactions and Templates
Reactions are used to automatically react to activated alarms. The IoTHub can either send out e-mails or call a REST-API endpoint to inform about the activation to cause further investigation.
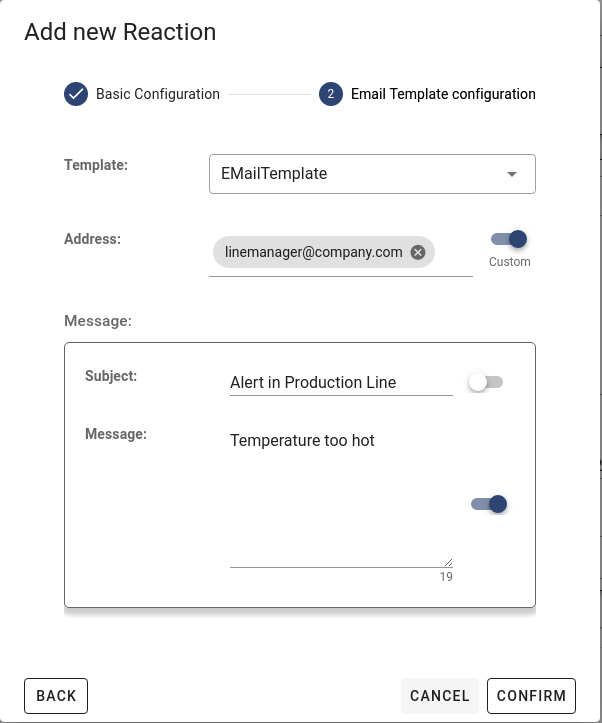
Templates are used to define reoccurring values to be reused in reactions. Whenever a template is assigned the user can either use the templates value or define a custom one by turning the switch next to each input to active.
Template Overview
Selecting templates in the navigation menu on the left side of the alarming overview leads to the list of defined templates that can be used. Buttons to add and delete templates can be found on the top right of the page.

Warning
Templates can only be deleted if they are not currently used by any reaction. In case of usage remove all reactions using this template or change them to use a different template.
Add a Template
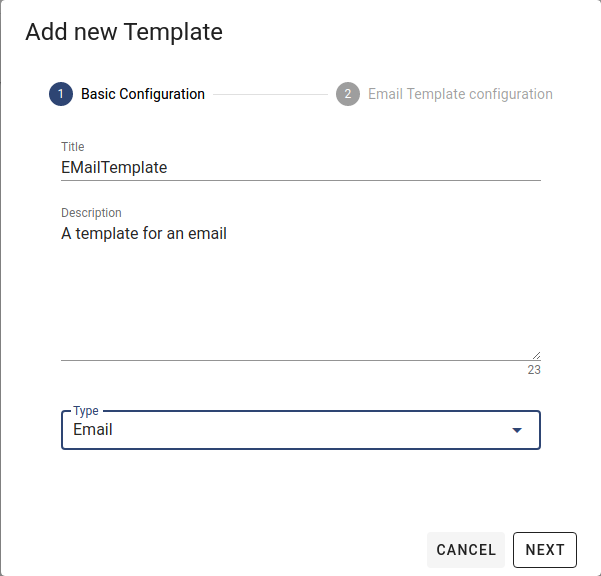
Every template must have a name and should probably have a description as well. The type selector determines the type of reaction which can use the template.
Add an Email Template
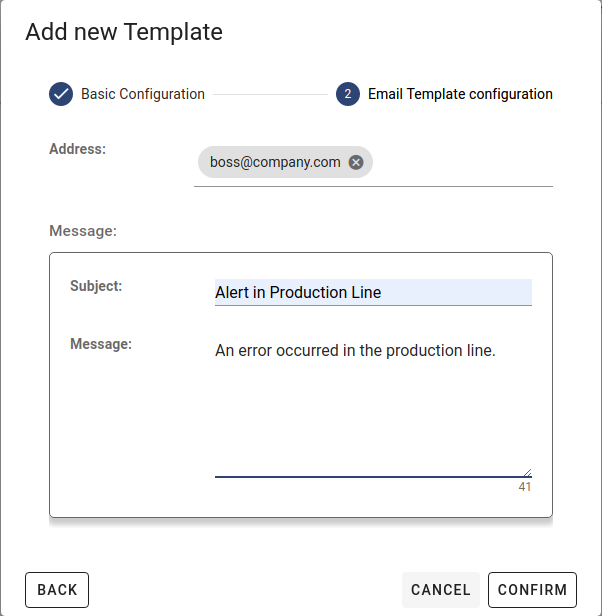
The second step of the creation dialog defines e-mail addresses, a possible subject and the message to be sent.
Add a Webhook Template
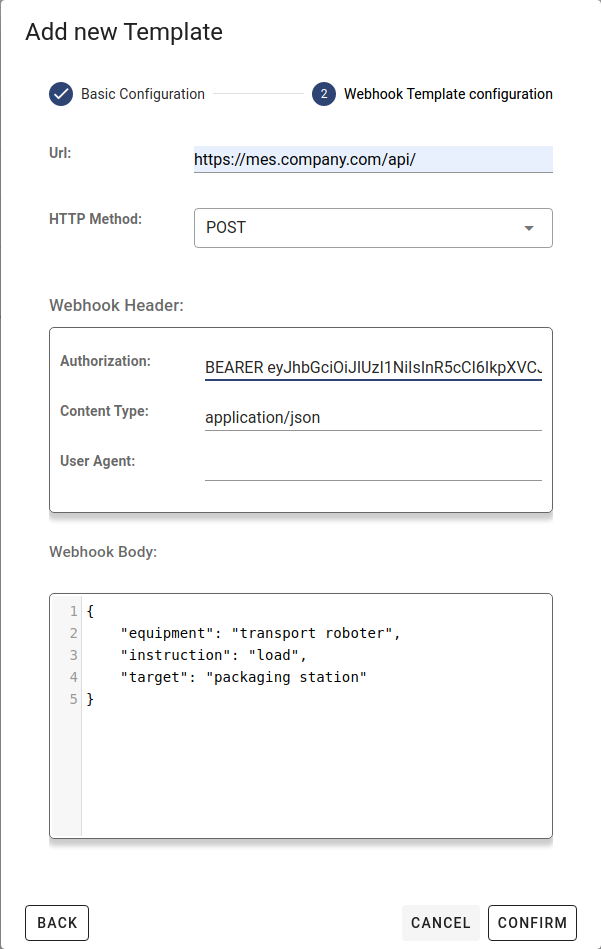
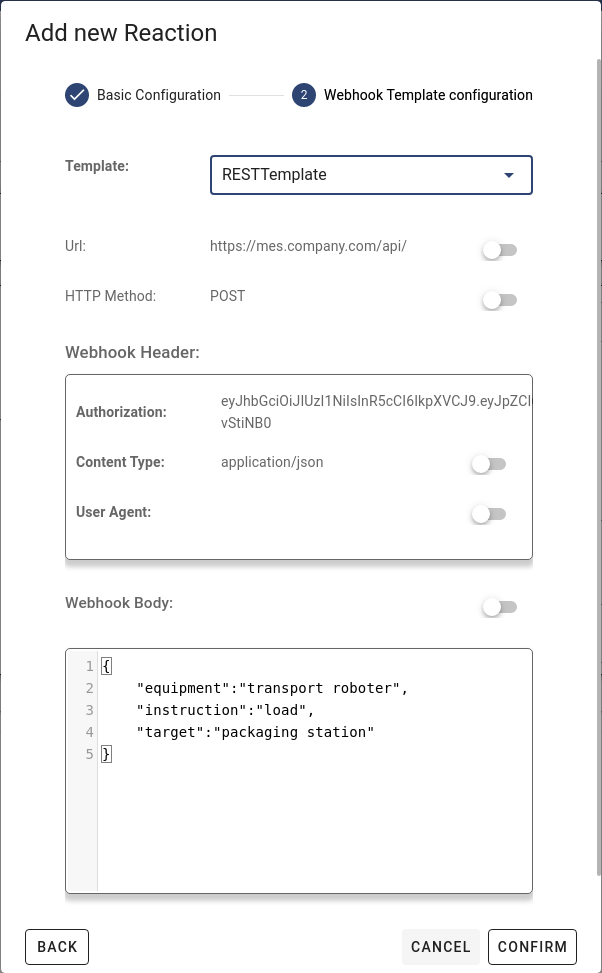
The webhook template needs a URL and HTTP method defining the REST endpoint. Additionally, some request headers and a body can be defined to allow for a greater range of endpoints to be used and data to be sent.
Add Reactions
The edit mode allows users to add and remove reactions to change notification behavior. Currently, the IoTHub offers two distinct types of reactions. E-Mail reactions will send out notification about activation if the according module is configured and running. Webhooks can be used to send data to a specified REST-API endpoint.
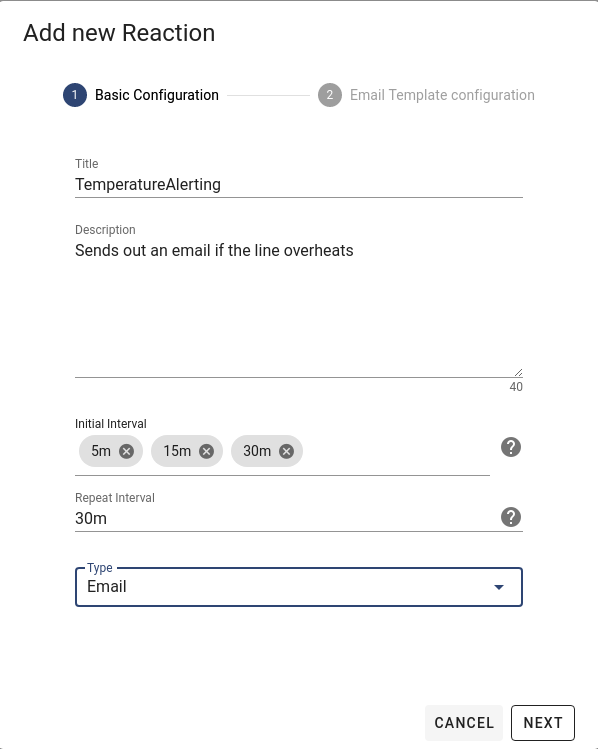
The most notable parts here are the initial and repeat intervals and the reaction type selection. Values required in the second step depend on the value of the reaction type (see below).
Initial interval
defines at what point in time after activation of the alarm a reaction will be sent. Future reactions will be cancelled once the alarm exits the active state. A reaction will be sent every time the state changes to active if left blank.
Repeat interval
defines at which interval reactions are sent. The first repeat cycle is started after all reactions from the initial interval have been processed.
Detailed information on reactions and templates can be found in here.
All fields defined in a template which can be changed in the second step (see below) will be shown whenever one is selected. The pre-filled values can be overwritten by changing the according switch (just right of the property) to custom and entering new values.
When selecting no template
all switches must be changed to custom to send the entered values to the IoTHub.
Add an Email Reaction
The IoTHub needs to be enabled to send e-mails via the according module. Please contact your administrator for further information on the subject.

Entering multiple e-mail addresses
is possible by pressing enter and inserting another one.
Add a Webhook Reaction
In the last step of creating a webhook reaction information on which URL to contact and with what HTTP protocol can be specified as well as a special request header and body.
REST-API
Be sure the REST-endpoint represented by the URL is up and running before trying to call it.