Agents
TIP
More detailed descriptions about agents and agent controllers, how to use them and the installation can be found at the user manual and installation manual.
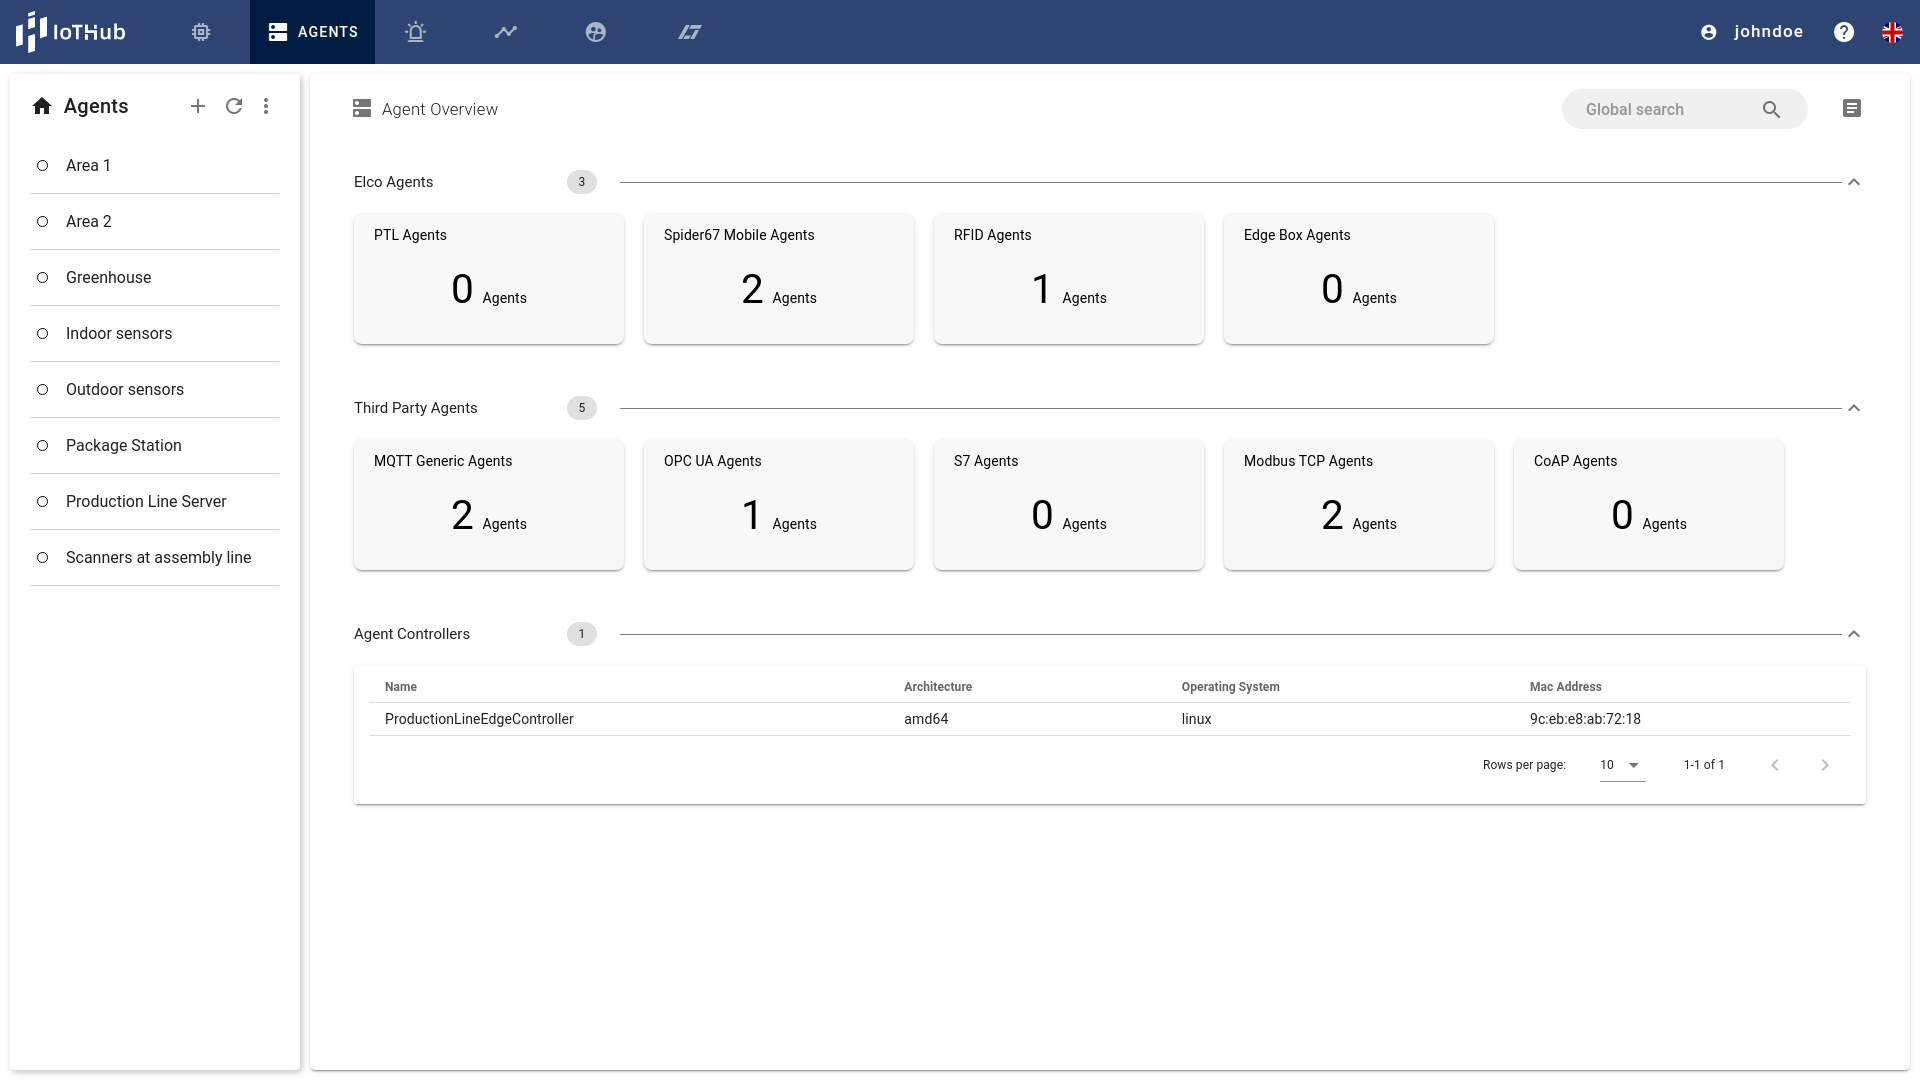
The agents overview page contains two main parts, the agents list on the left side and the tile view on the right. The overview page can be reached by opening the agents page clicking on the icon in the Navigation Bar or by clicking the icon in the upper left corner of the agents page.

The tile view on the right is split into three areas, one for agents related to products of the ELCO Holding and the second for all remaining. The reason is the different counting regarding the license. The third area addresses the agent controllers, an edge program assisting the user to install and control agents on an edge node. The areas can be collapsed using the icon and expanded using the
icon. Each tile contains the amount of agents of this type.The agents list at the left shows the visible agents for the user. With the icon a new agent can be added, the loads the current agents list if there is doubt about the currency of the data and the menu for several actions around agents. They are described at the User manual.
Each entry in this list contains a status indicator on the left side, showing if the agent is connected, inactive or in an error state. Selecting one of the agents opens the agents details on the right side.
Agent Details

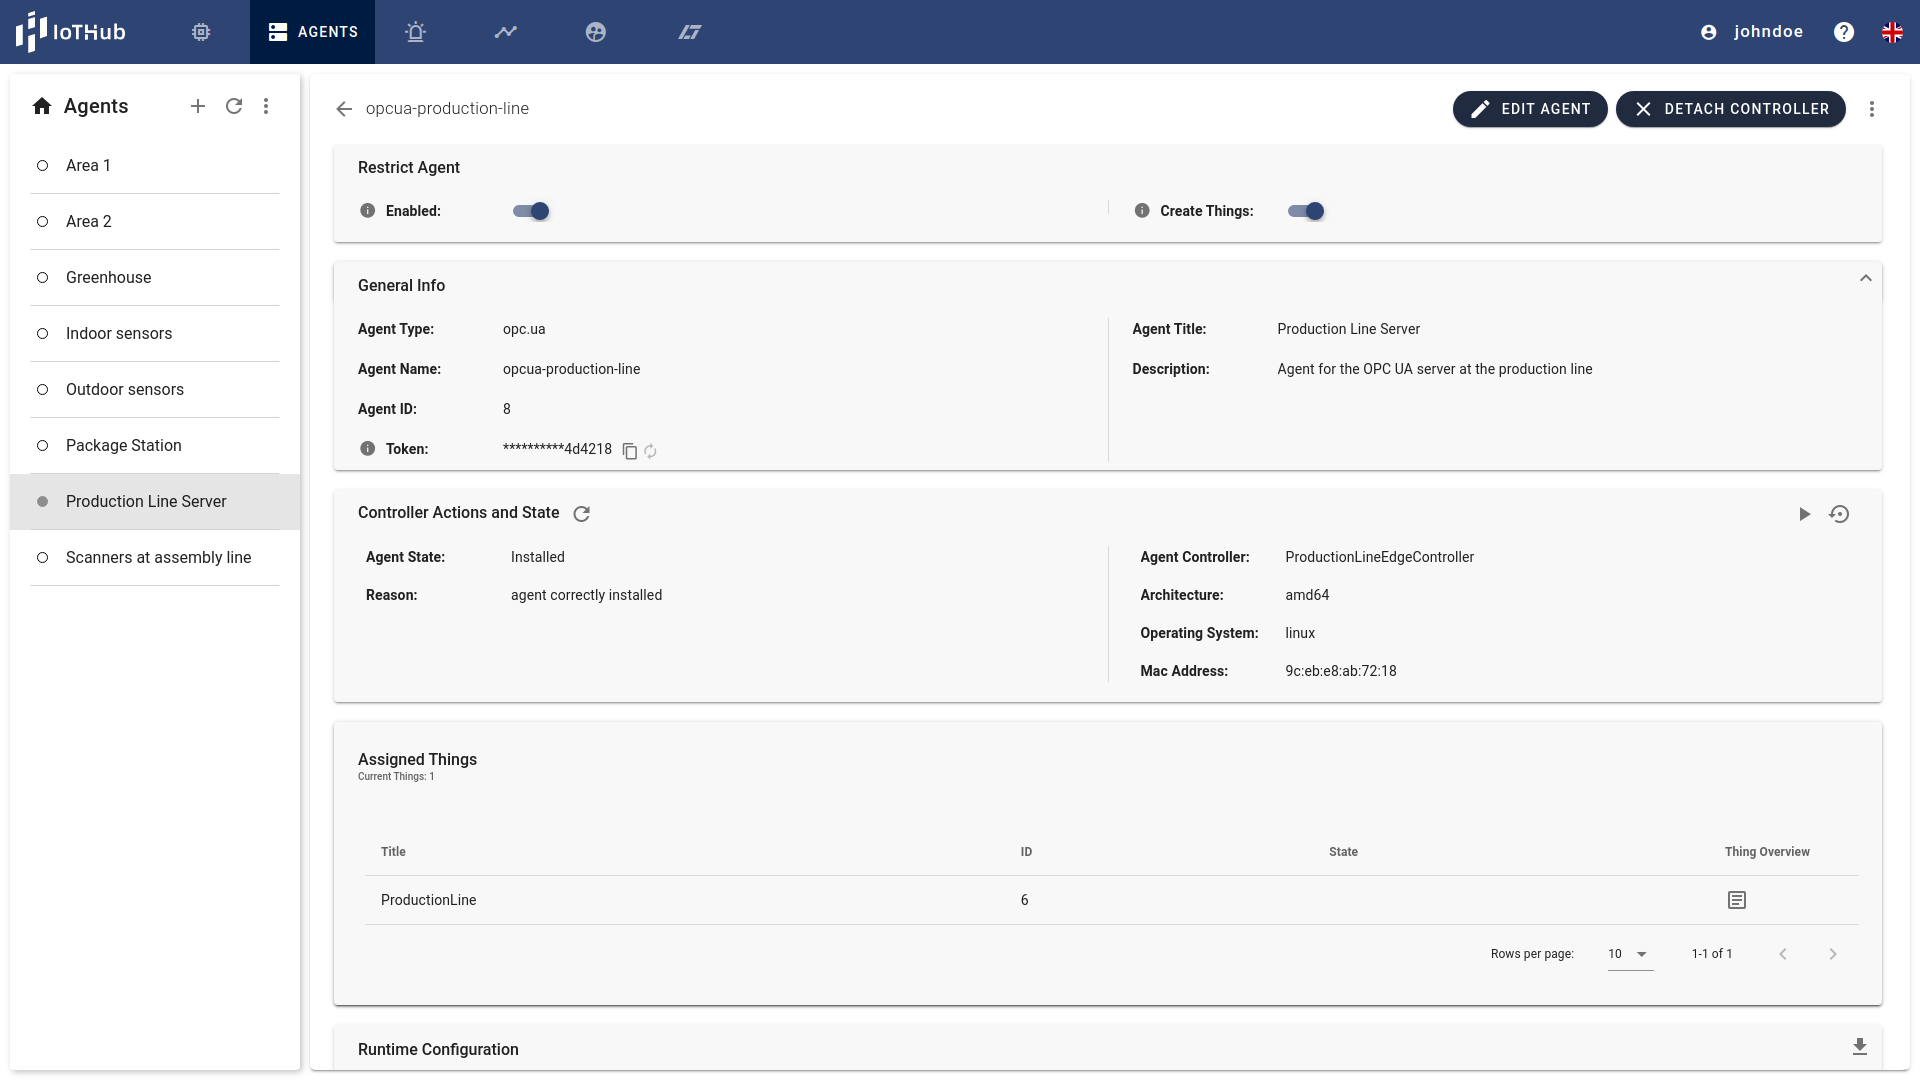
The agents detail view contains up to five areas. In the upper area there are two shortcut actions to enable/disable the agent and allowing/ disallowing the agent to create things. Allowing is helpfully for decoupled communication like MQTT, when new devices register at a broker, they can automatically appear in the IoTHub.
The second section contains the metadata of the agent including the token, which is needed to start the agent. The agent state is located below. Depending on whether a controller is assigned to the agent or not and how the agent state is, different actions can be triggered from this panel.
| Icon | Action |
|---|---|
| Assigns a controller to this agent. | |
| Refreshes the state of the agent | |
| Installs the physical agent to the edge node of the controller | |
| Starts the agent at the edge node | |
| Stops the agent at the edge node | |
| Resets the agent, detach it from the controller and stops it |
The next panel shows the associated things of the agent. To add or remove things the agent must be switch into the edit mode by pressing the EDIT AGENT button at the top of the page. Clicking on the icon of the thing opens a things overview with the current setup and property values of the thing.
The last panel allows to download or to setup (in edit mode) the configuration of the agent. It can be used to start the agent manually if needed.