Writing Scripts
Please Note
TIP
Scripts are written in JavaScriptCore, the common part of each JavaScript dialect. Therefore, in order to use Scripts you need to know how to program in JavaScript.
Applications of the Scripts
Scripts can be used to
- manipulate things and properties of the IoTHub,
- connect different things and properties and create program logic inside the IoTHub,
- read and write data from a database,
- request and receive HTTP requests to access APIs of external systems,
- read and write files,
- send E-mails,
- send push notifications to notify users on smartphones or tablets.
- ...
Prerequisites for using Scripts
In order to use Scripts in the IoTHub, you have to keep in mind, that you need to have a license and installation file of the IoTHub, which also contains the Script Module. A decent understanding of JavaScript or similar scripting language is recommended.
Overview of the Scripts Functions in the Web UI
In this paragraph the basic functions of the Scripting Module are explained.
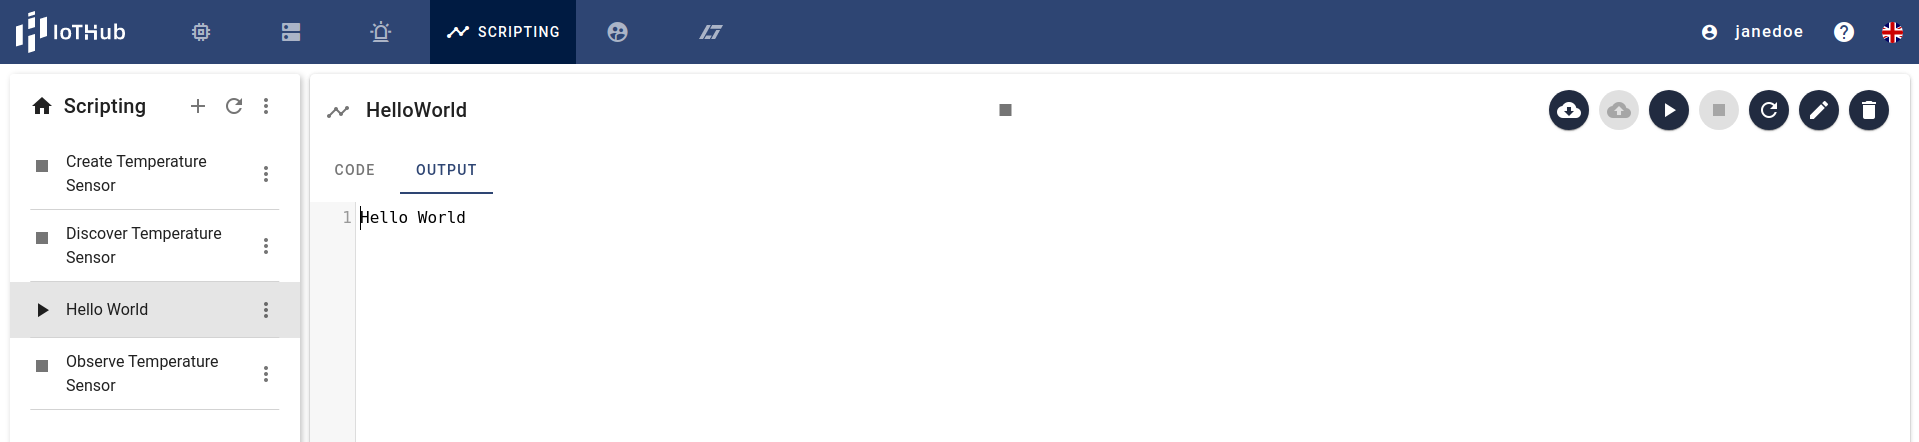
Open the Scripts Tab
To access the scripts, you need to log in to your IoTHub and then click on the Scripting tab in the navbar.

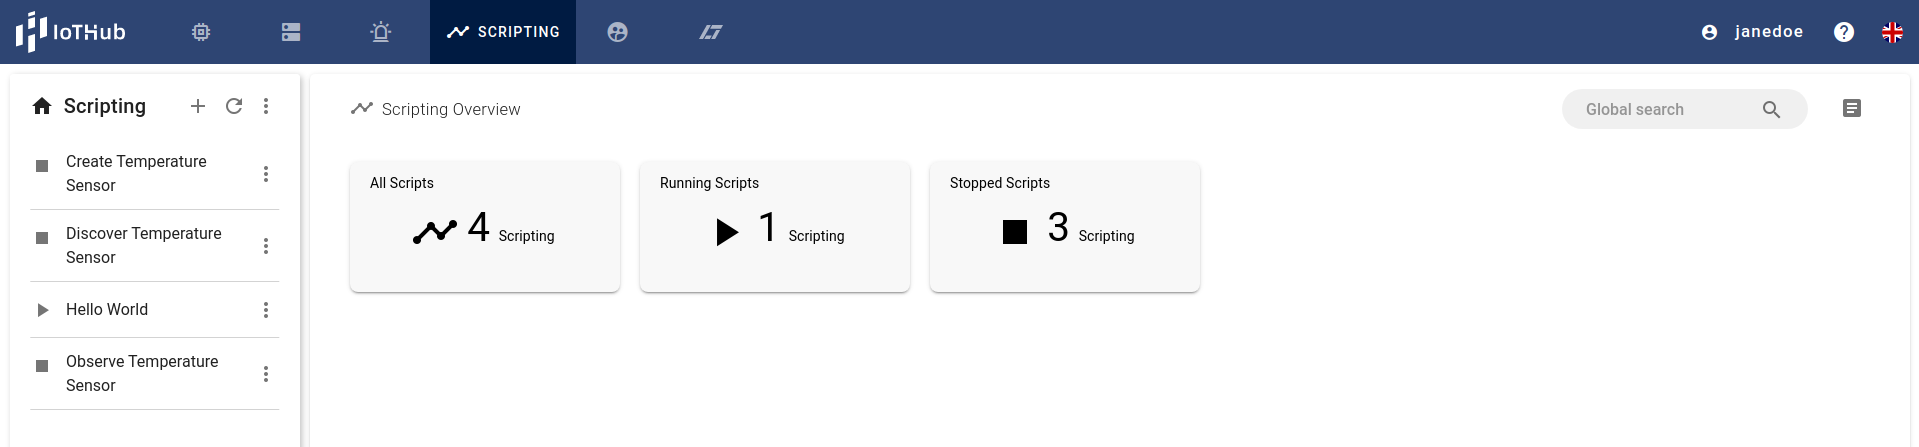
Scripting Overview and Editing
The Scripting Overview gives you a list of all Scripts with their names. The list can be sorted by clicking at the column names like the "Name". Three cards give you further information how many scripts are running and how many are stopped.
Once you selected one of the scripts, you can see the script code in the editor field. On top of the editor, multiple buttons are displayed for interacting witht he script.
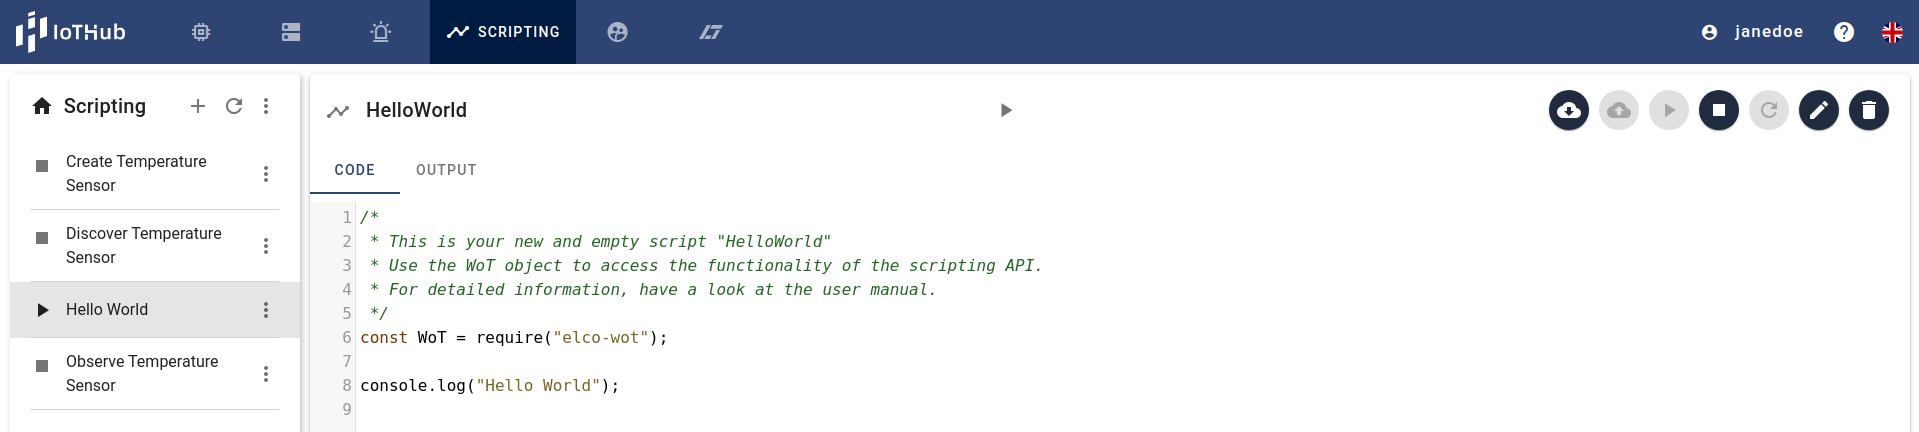
More information about what each action does can be found in the table below.
| Icon | Description |
|---|---|
| Downloads the latest version from the IoTHub | |
| Saves/Uploads the version from the IDE to the IoTHub | |
| Starts the script uploaded to the IoTHub | |
| Stops the script running at the IoTHub | |
| Refreshes the output windows | |
| Edits the metadata of the script | |
| Deletes the script from the IoTHub |
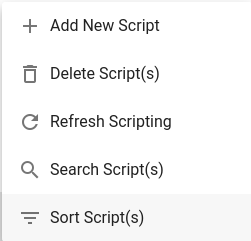
A click on the context menu also gives you multiple options for deleting, searching and editing the script.
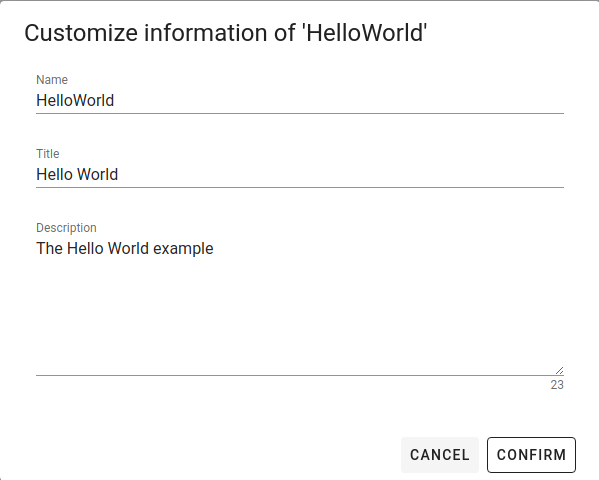
Add a Script
Add a new script by opening the scripts menu and clicking on the Add new Script Item.
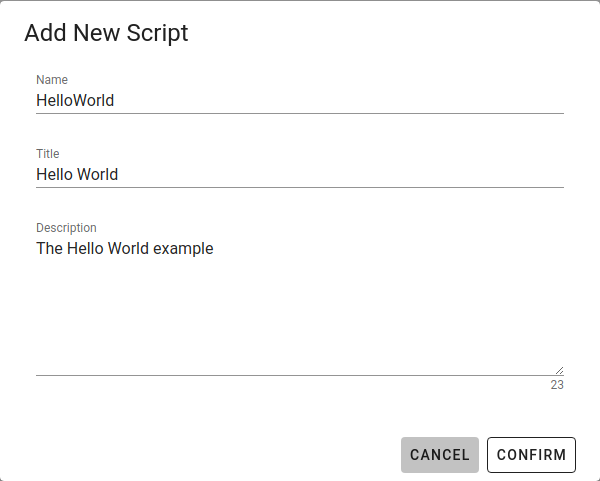
or clicking the Button directly. Then a dialog will open up for entering the unique name, human-readable title and a description of the script. Confirm your input by clicking the CONFIRM button.
Edit a Scripts Details
Edit a selected script's meta information by clicking Edit. A dialog will open up for entering the unique name, human-readable title and a description of the script. Confirm your input by clicking the CONFIRM button.
Script Editor
The script editor in the IoTHub contains e.g. the following functions:
- Autocompletion
- Syntax Highlighting
- Right click support
Once you have a working script, you can save it to the IoTHub by clicking the Save button, then start the script by clicking the Start button. The Output Tab will show the output of the script.
If you are not sure where to start, you can start with the example scripts from the tutorial section.
Upload a Script
When the development of the script is completed or the intermediate state should be stored, upload the script by clicking on the button.
Uploading a Script is a necessary step in order to push the Script from the WebUI in the browser to the IoTHub. This is because the WebUI and the IoTHub can be located on different computers.
If your Script was uploaded successfully, the pop-up 'Script successfully updated' will appear on the bottom.
Control a Script
In order to control the Script you find different functions in the toolbar on the top right. These controlling functions will be explained in the following paragraph.

These can also be found in the table above.
Start a Script
In order to get a Script running you have to click on the button. If the Script started successfully, the black icon in the middle will switch to .
The view will then switch to the Output View.
Stop a Script
In order to stop a running Script you have to click on the button. If the Script stopped successfully, the black icon in the middle will switch to .
Download a Script
In order to see the current version of a Script, which is stored on the actual IoTHub, in your WebUI, you have to click the button. If you have downloaded the Script successfully, your WebUI gets updated automatically, and you see the downloaded Script in your WebUI.
As mentioned before the WebUI and the actual IoTHub can be located on different machines. This means the version in the WebUI might be different from the one stored on the IoTHub.
Downloading a Script
Note that downloading a Script will not download it to your computer but will update the script in the WebUI. This will overwrite your unsaved changes.
Delete a Script
Delete a Script
Please note that deleting a script, deletes it for good. You can not undo this action.
If you do not need the script anymore, you can delete it by clicking on the button.
Then you will be asked if you are sure, that you want to delete this script.
If you are sure, then confirm by clicking DELETE. If not, then cancel the deletion by clicking on CANCEL.
Once the Script is deleted successfully, a pop-up will appear at the bottom saying 'Script successfully deleted.'
Output View
The Output View shows the outputs of the Scripts in chronological order. Therefore, the latest output appears on the bottom.
The outputs of the Script in the Output View are refreshed when switching from the Editor View.
Updating the Output View
Be sure to click on the button, which you can find on the top right as the output will not refresh periodically.
Characteristics of Scripts
The scripts have some special characteristics, that will be described here, in order to understand how the scripts work.
Asynchronous
Scripts are asynchronous. This means
- that each script runs in its own process,
- that different scripts can be run parallel,
- that the different scripts are not synchronized with each other,
- that therefore one script does not notice whether another script crashes or not,
- that scripts can only be connected to each other through things and their properties.
Multiple Scripts
In one IoTHub you can create as many scripts as you like. If you create an application with one script or with several scripts is up to you. Creating different scripts makes sense, if different scripts perform different processes, different scripts can be performed independently of each other. If you can split up a process into different scripts, splitting up could be beneficial because you can more easily reuse a script for another IoTHub, if one script crashes, not all scripts crash, you have an easier overview of all the processes performed as scripts; this helps to maintain scripts.
WoT Scripting API
The data model of the IoTHub is based on the WoT Specification. As a base for writing scripts the WoT Scripting API used. A deeper introduction into the usage can be found at
- Producing a Thing
- Discovering and Consuming a Thing
- Reading, Writing and Observing Properties
- Invoke Actions
Available Node Modules in scripts
The scripts are written in JavaScript and allow to use a bundle of node packages.
How to Use a Node Module
You have to require a Node Module in order to use it.
const axios = require("axios");
List of Node Modules
The following Node Modules are available:
| Name | Version | Link | Usage |
|---|---|---|---|
| axios | 0.19.2 | https://www.npmjs.com/package/axios/v/0.19.0 | HTTP client |
| bcrypt-pbkdf | 1.0.2 | https://www.npmjs.com/package/bcrypt-pbkdf | Crypthography |
| form-data | 2.3.3 | https://www.npmjs.com/package/form-data/v/2.3.3 | Transforms files and forms into a HTTP compatible format |
| is-buffer | 2.0.3 | https://www.npmjs.com/package/is-buffer/v/2.0.3 | Checks a variable for being a Buffer object |
| is-typedarray | 1.0.0 | https://www.npmjs.com/package/is-typedarray | Checks a variable for being a typed array |
| isarray | 1.0.0 | https://www.npmjs.com/package/isarray | Checks a variable for being an array |
| ms | 2.0.0 | https://www.npmjs.com/package/ms/v/2.0.0 | Converts various time formats to milliseconds |
| mssql | 5.1.4 | https://www.npmjs.com/package/mssql/v/5.1.0 | MS SQL driver |
| mysql | 2.18.1 | https://www.npmjs.com/package/mysql/v/2.17.1 | MySQL driver |
| nodemailer | 6.5.0 | https://www.npmjs.com/package/nodemailer/v/6.2.1 | Sends E-Mail |
| oauth-sign | 0.9.0 | https://www.npmjs.com/package/oauth-sign | OAuth signing |
| sqlstring | 2.3.1 | https://www.npmjs.com/package/sqlstring/v/2.3.1 | Simple SQL escape and format for MySQL |
| uri-js | 4.4.1 | https://www.npmjs.com/package/uri-js | RFC 3986 compliant, scheme extendable URI parsing/validating/resolving |